Layer Manager
The Layer Manager adds project layers to the map with the correct symbology applied and in an appropriate table of contents hierarchy.
The user can view different topo project layers that may not normally be placed on the map from running a tool alone (e.g. Thalweg, DEM, Control Points, etc.). In addition to this, layers can be removed from the map and a user can get an idea of where they are at in the overall workflow based on what can be accessed through the Layer Manager.
Prerequisites
- A valid topo project must be open to activate the Layer Manager button.
Steps
- Open the Layer Manager by clicking the button on the CHaMP Topo Toolbar, highlighted in a red box below in the image below.
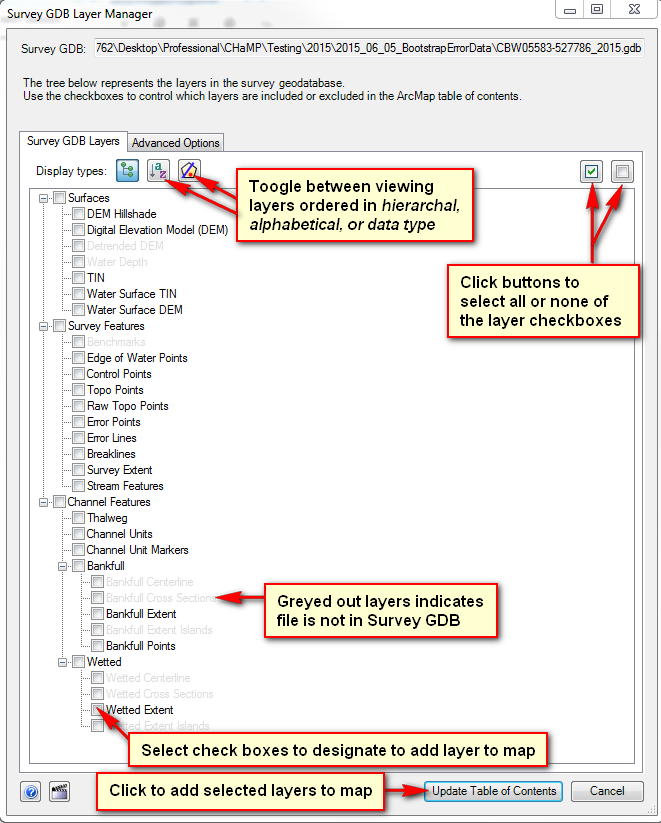
- Select the layers to add to the map by checking or unchecking their boxes.
- Click
Update Table of Contentsto add the checked layers to the map.

The Layer Manager user interface is shown in the image below and the different features are detailed.
Below is a video tutorial exploring how to use the functionality of the Layer Manager.