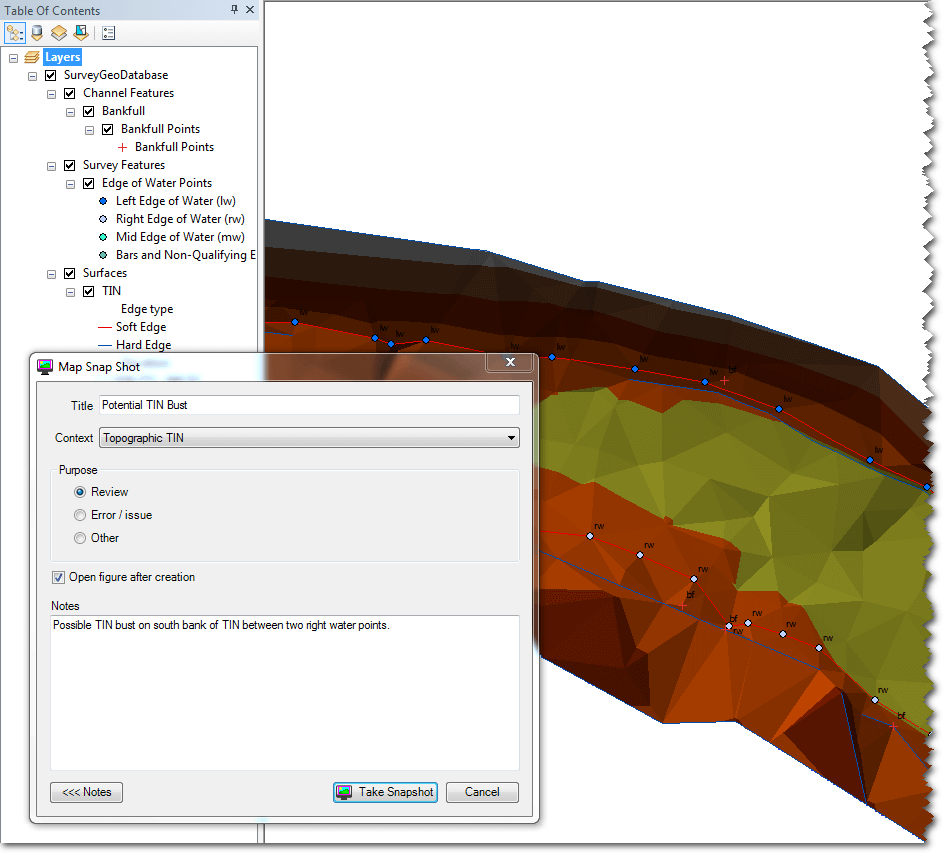
Map Snapshot
The map snapshot tool captures the contents of the ArcMap data frame and writes it to an image file within the active topo project. This is useful if you see problems or interesting features in your data and want to quickly save an image for later review.
We encourage toolbar users to use this tool frequently. There is no cost to capturing snapshots and they provide incredible value for people reviewing the data products and processing steps at a later time.

The map snapshot tool captures whatever layers are visible in ArcMap map data frame. You can zoom, pan, turn layers on and off to customize precisely what the tool captures. If you are trying to capture a specific issue, make sure that you zoom in close enough to center the image on the desired location.
The images produced by the map snapshot tool are included with the topo project when it is published.
Inputs
The following inputs are captured when you create a map snapshot:
Title: Provide a title for the image that describes the contents of the image. Be as descriptive as possible.
Context: Pick the most appropriate context from the dropdown list. The items in the list are intended to capture the main topo processing tasks. It’s helpful if you can find one that fits your need, but choose the other item if you can’t find an appropriate context.
Purpose: This is the high level reason for capturing the snapshot.
Review - Use this purpose when adding toolbar layers to the map to review their status or generally look at the survey geodatabase contents.
Error/Issue - Use this purpose when you discover a problem with a data layer, or the result produced by one of the tools.
Other - Use this purpose for any other need.
Open Figure: Check this box to see the map snapshot image after it is generated. The file will be opened in whatever is your default software for viewing PNG images.
Notes: Click the Notes button to expand the form and expose the additional text box for entering general notes about the map snapshot.